Account Settings and what they do
In this article, we will define what each setting handles and what you should set for each option. If you have any questions, please feel free to open a ticket or call our office at 855-444-6414!
1: Settings
In this section, you control the Global default settings for your phone system.
Time zone: This sets the time zone for your account.
Caller ID Name: This is editable global default text for your Caller ID. You are limited to 15 characters. A Space is considered a character.
Caller ID Number: This is the global outbound default Caller ID number for your account. You may select any of your numbers are your global Caller ID number for outbound calls.
Music On Hold: Here, you can select any existing Hold Music that you've uploaded to your Media Library, or simply add new Music on Hold.
Name: Name your Music on Hold recording to be able to find it later.Choose File: Select your file from your local machine.Plus Icon: Uploads the selected media. Please allow the file to upload before clicking "Update" at the bottom of the page.Note: Your media cannot exceed 10MB in size. All media should be uploaded in a .WAV or .MP3 format.
Verify Selection Before Transfer: By Selecting YES, this adds a confirmation message to verify you want to continue with transferring a call. This is helpful if you misdial an extension before transferring a call.
Directory Sort Order: If the Company Directory option is enabled in your Menu, this will sort the Company Directory by LAST name or FIRST name.
Park Presence: This controls how your Parking spaces are handled.
Park Presence: This controls how your Parking spaces are handled.
Park Presence > IN USE: If this option is selected, a BLF(Busy Light) will show Steady while a phone call is coming into an extension
Park Presence > Ringing: If this option is selected, a BLF(Busy Light) will blink while a phone call is coming into an extension
Park Time Out> After a user is placed in a Parking Spot, at expiration of this time, the call will be presented back to the user. Minimum of 10 seconds and a maximum of 9,999 seconds.
2: Provisioning
In this section, we explain what Provisioning is.
Once your account has been provided by our team, this information can be used to provision additional devices.
FTP Host: This is the hostname you need to enter into your provisioning section of your selected voip phone. It is not unique to your account.
FTP Username: This is unique to your account. Enter this username into the provisioning settings of your selected voip phone.
FTP Password: This is unique to your account. Enter this password into the provisioning settings of your selected voip phone.
FTP Username: This is unique to your account. Enter this username into the provisioning settings of your selected voip phone.
FTP Password: This is unique to your account. Enter this password into the provisioning settings of your selected voip phone.
 Note: All provisioned devices use the same username and password during provisioning. Do not share this information with anyone outside of your team.
3: General Information
This is unique information about your account.
Account ID: This is your unique account ID. Support Staff may ask you this information to verify they are accessing the correct account during support calls.
Modified: This will display a date and time when your account was last modified.
Modified: This will display a date and time when your account was last modified.
Created: This will display the date and time your account was created by our team.
VoIP ID: This is an internal ID number which uniquely identifies your account.
Relm: This is your Realm Name which was set by voipMD staff during provisioning.
International Pin: This will display the Pin number to make international calls, if enabled on your account.
VoIP ID: This is an internal ID number which uniquely identifies your account.
Relm: This is your Realm Name which was set by voipMD staff during provisioning.
International Pin: This will display the Pin number to make international calls, if enabled on your account.
4: Reset BLF
In the event that a BLF or Busy Lamp Function is stuck blinking, you can clear it here.
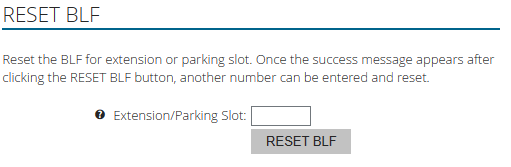
Extension/Parking Slot:
Extension/Parking Slot:
1: To clear a BLF for an extension, insert the Extension, then click RESET BLF2: To clear a BLF for a Parking Slot, enter *3 followed by the Parking Number, then click RESET BLF. EX: *31 (1 for the Parking Slot)
Related Articles
Yealink Auto-Provisioning
When looking to auto provision a Yealink device you will want to factory default Press and holding the OK button on the physical device until you see a screen asking if you want to reset the device to factory settings When the device comes back up ...Poly VVX Provisioning Instructions
The screen shot below represents the correct procedure to auto-provision the Polycom VVX Series phones. FTP Username and FTP Password will vary by Account, so please find your information on VOIP > ACCOUNT SETTINGS > PROVISIONING. To obtain the IP ...How to Set up Time of Day Routing
If you have any questions or need assistance, please call our office at 855-444-6414. In order for your phone to automatically open and close without the need to "forward calls after-hours", you will need to set up Time of Day Routing. This is ...How to Add a User
Before adding users to your account, please ensure you are the Administrator for your account. If you are unsure, please call our office at 855-444-6414. Step One Log into your account at https://my.voipmd.com then click on VOIP Step Two Click on ...How to add a device
If you need any assistance in adding a device, please call our office at 855-444-6414. Step One Log into the Atlas portal by navigating to https://my.voipmd.com Then, click on VOIP Note: You must create a user first before adding a device. Navigate ...